Common Configuration Tasks
These tasks are common to all types of connectors.
Create a Workflow
-
From the Navigation tree, click [Workflow] and then select [Workflow Design].
-
On the Workflows tab, click
 [Add].
 -
In the Create Workflow screen, enter a unique name for the workflow and an optional description. For the Job Processing Location, select On Server or On Device.
Refer to the SLNX Administrator’s Guide for further information regarding On Server vs. On Device job processing.
-
On the General tab, complete the following fields:
Setting
Options
Workflow Name
A unique name for the workflow.
Description
Enter an optional description.
Job Processing Location
Reflects the choice you made in the Create Workflow screen.
Configuration Validation Server
Specify the server to use for testing the workflow.
Display Name
The name of the workflow that will appear on the MFP. You can set the display name in multiple languages.
Screen Icon
Choose an icon that will appear on the MFP.
-
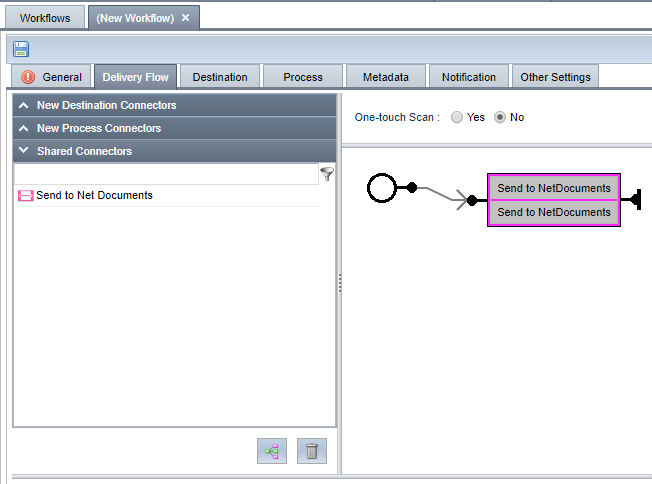
On the Delivery Flow tab, click the [Shared Connectors] section to view all shared connectors.
If you created a connector for a single workflow only, the connector is located in the New Destination Connectors / New Process Connectors section instead.
-
Drag and drop the connector to the endpoint of the workflow, as shown in the example below.
-
Enable One-Touch Scan if the connector supports the functionality.
Some connectors allow you to configure One-Touch scan. When enabled, users login at the MFP, launch the connector and all settings are selected for them. They simply load the document and tap Start to begin scanning.
Refer to the Connector configuration instructions for the connector in question to determine if One-Touch scan is supported.
-
Proceed to configure settings on the remaining tabs within the (New Workflow) screen.
-
Click [Save] to save the workflow.
Refer to the SLNX Administrator’s Guide for further information regarding workflow design.
Configure a Workflow Profile
Connectors are distributed to targets MFPs within Workflow Profiles. Follow these instructions to identify the target MFPs for the connector.
-
From the Navigation tree, click [Workflow] and then open the [Workflow Profile] folder. Select. [Profile Configuration].
-
On the [Profile Configuration] tab, click
[Add]. -
In the Create Workflow Profile screen, enter the following:
- Under Profile Name, enter a unique name for this profile that you can use to easily identify in the list of profiles.
- Enter an optional description.
- For Input Source, select one input:
MFP (users will use the scan function on the MFP)
Hot folder (an auto managed folder is the target source)
Refer to the SLNX Administrator’s Guide for further information regarding the remainder of the settings on the General tab.
-
Switch to the [Workflows] tab.
-
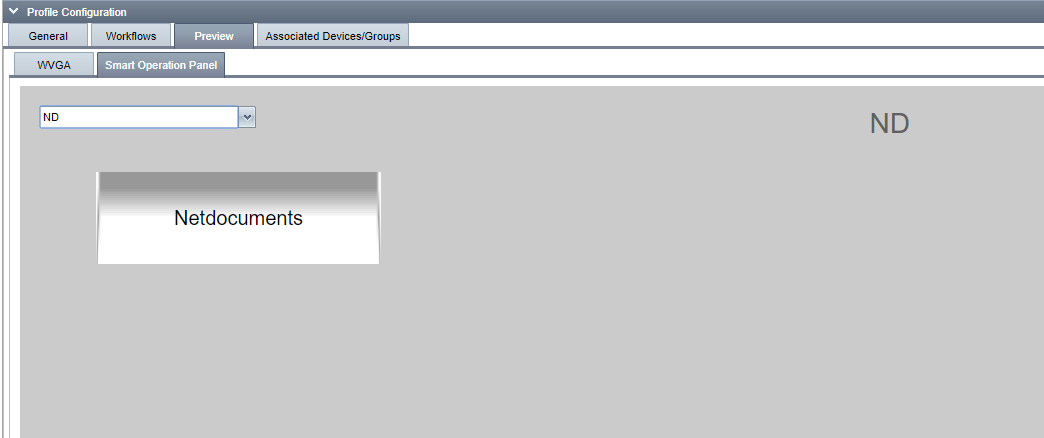
Click [Add a Group] and name the group. Each group appears as a separate section on the MFP. Switch to the Preview tab at any time to view how the groups will look on the MFP.
-
Click [Add a workflow/application] and select the connector that you configured. You can add more than one workflow to the profile if necessary.
-
Switch to the [Preview] tab to confirm the results (example shown below).
-
Click [Save].
Test the Workflow
Refer to the SLNX Administrator’s Guide for full details about performing this test, including limitations for One-Touch scan and required field information.
Ensure you test the workflow before pushing the profiles to Target MFPs. This procedure allows you to simulate the workflow at the MFP without having to actually go to the MFP to perform the test.
-
From the Navigation tree, click [Workflow] ⟶ [Workflow Design].
-
Select the workflow to test, and then click Test.

-
In the Workflow Test pop-up screen, upload one or more files to test, and select one or more Delegation servers to use for the test.
-
Switch to the Workflow Parameters tab and specify the user account that is executing the workflow, the destination connectors, process connectors and metadata.
-
Click [Run] to perform the test.
Push the Profile to Target MFPs
After completing Configure a Workflow Profile, the profile appears under [Workflow Profile] ⟶ [Profile Tasks].
-
From the Navigation tree, click [Workflow] ⟶ [Workflow Profile] ⟶ [Profile Tasks].
-
Select the Workflow Task from the list that you want to push to the MFPs.
-
Switch to the [Target Device Groups] tab.
-
Choose one device or a group of targets that will receive the workflow profile.
-
Either switch to the [Schedule] tab to set a schedule when this task will run or disable the task.
-
Click [Save]. Optionally, click [Run Immediately] to start the task immediately.
-
Ensure that you log in to an MFP to verify that the profile was deployed and functions as expected. While the profile is pushed to the MFP, the MFP displays the message “Profile Refreshing”.